Assembly Instructions
This unit was assembled at the factory and the cap screws were purposely not tightened. Before installation, the unit should be disassembled by removing the cap screws, retainer cap, o-rings, packing, lens and cushion gaskets. Before welding, replace only the retainer cap to the unit body and tighten the cap screws. The cap will help to prevent the base rem warping during the welding process. Use the appropriate welding procedures to prevent distortion of the unit body. After the unit body has cooled the unit may be completely reassembled by following the instructions below.
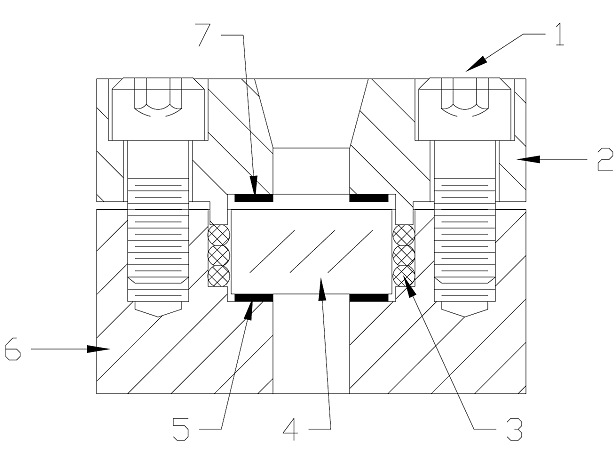
Remove any deposits from the bottom seat. Place one gasket (5) on bottom seat. Place lens (4) on gasket. Place the o-rings or packing (3) into the space between the outside of the lens and the inside of the body (6). Place the remaining gasket (7) on top of the lens. Place the retainer cap (2) in position and install the cap screws (1). Tighten down cap screws approx. 30-49 ft-lbs incrementally using proper torquing procedures to ensure even sealing. It is not necessary to achieve metal to metal contact of the body and can upon assembling the sight glass.